User Guide
Step-by-step guides for video translation, image translation, main and detail image generation, model and scene image generation, and the browser extension
Video Translation Overview
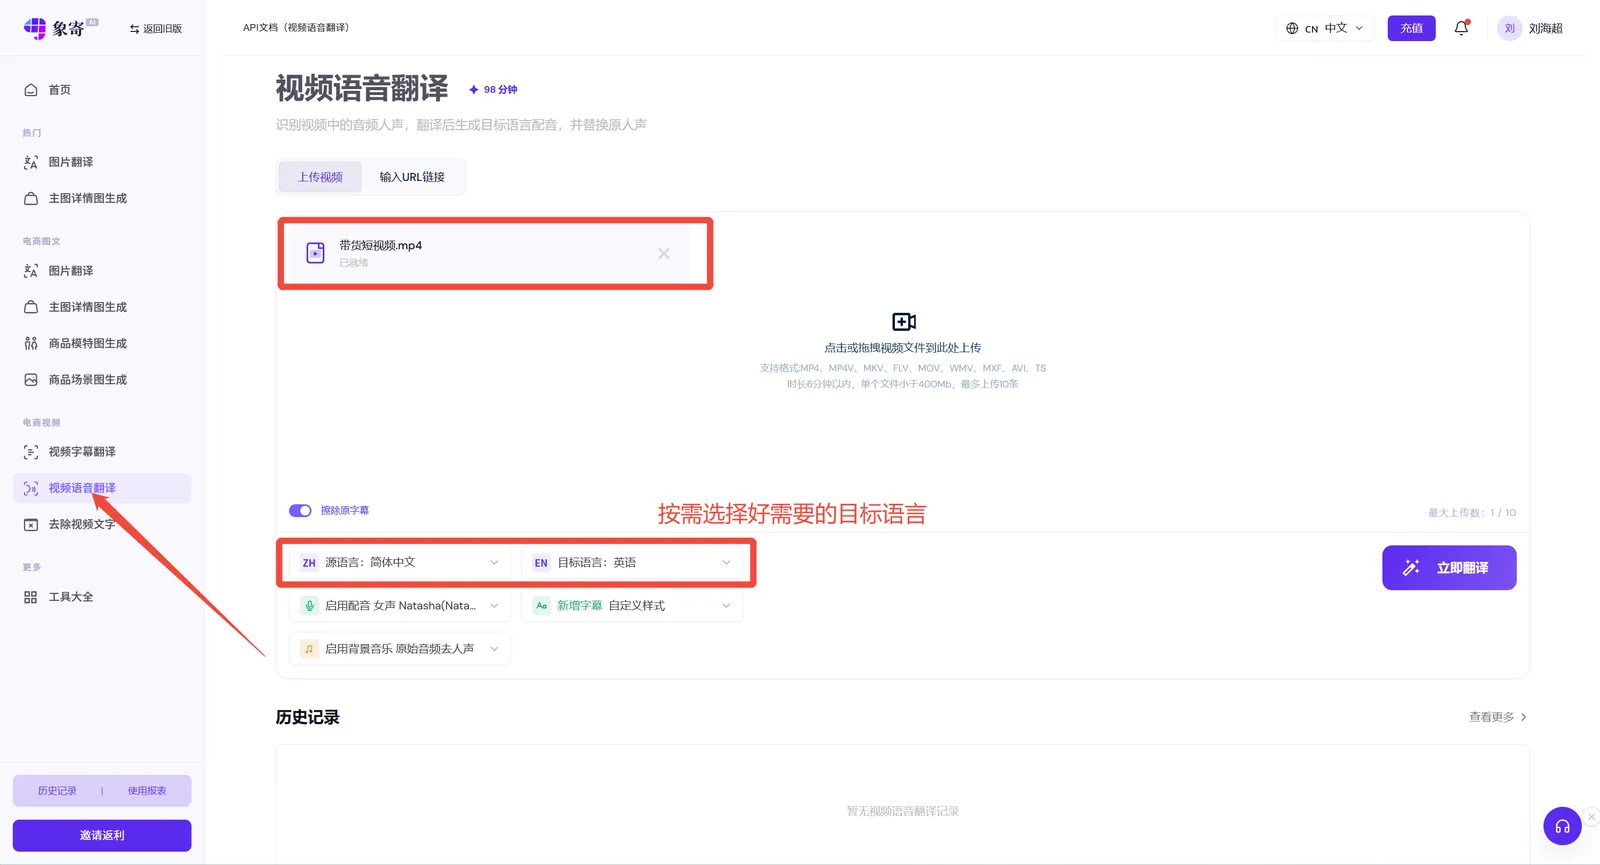
- Audio recognition translation: supports uploading videos with pure human voice and no subtitles (videos with original subtitles are also supported) — the audio is recognized and translated into a foreign language, and you can choose whether to add subtitles as needed.
- Subtitle recognition translation: supports uploading videos with original subtitles. AI translates the subtitles automatically, then dubs the translated subtitles with a foreign-language voice.
- Text removal: upload videos containing on-screen text and the text will be recognized and removed.
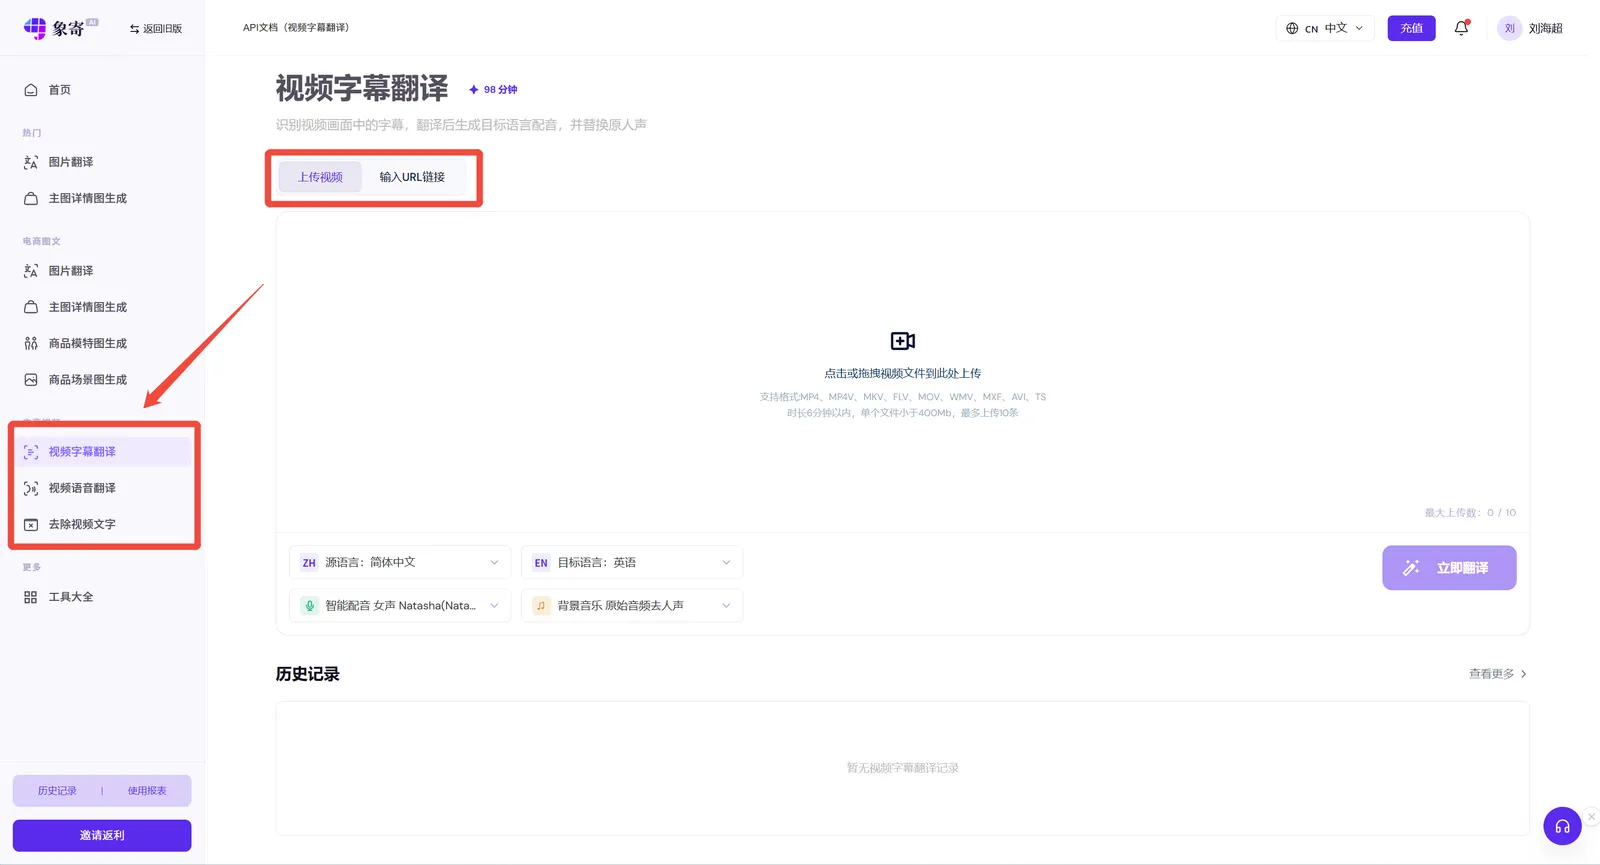
Step 1: Upload a Video
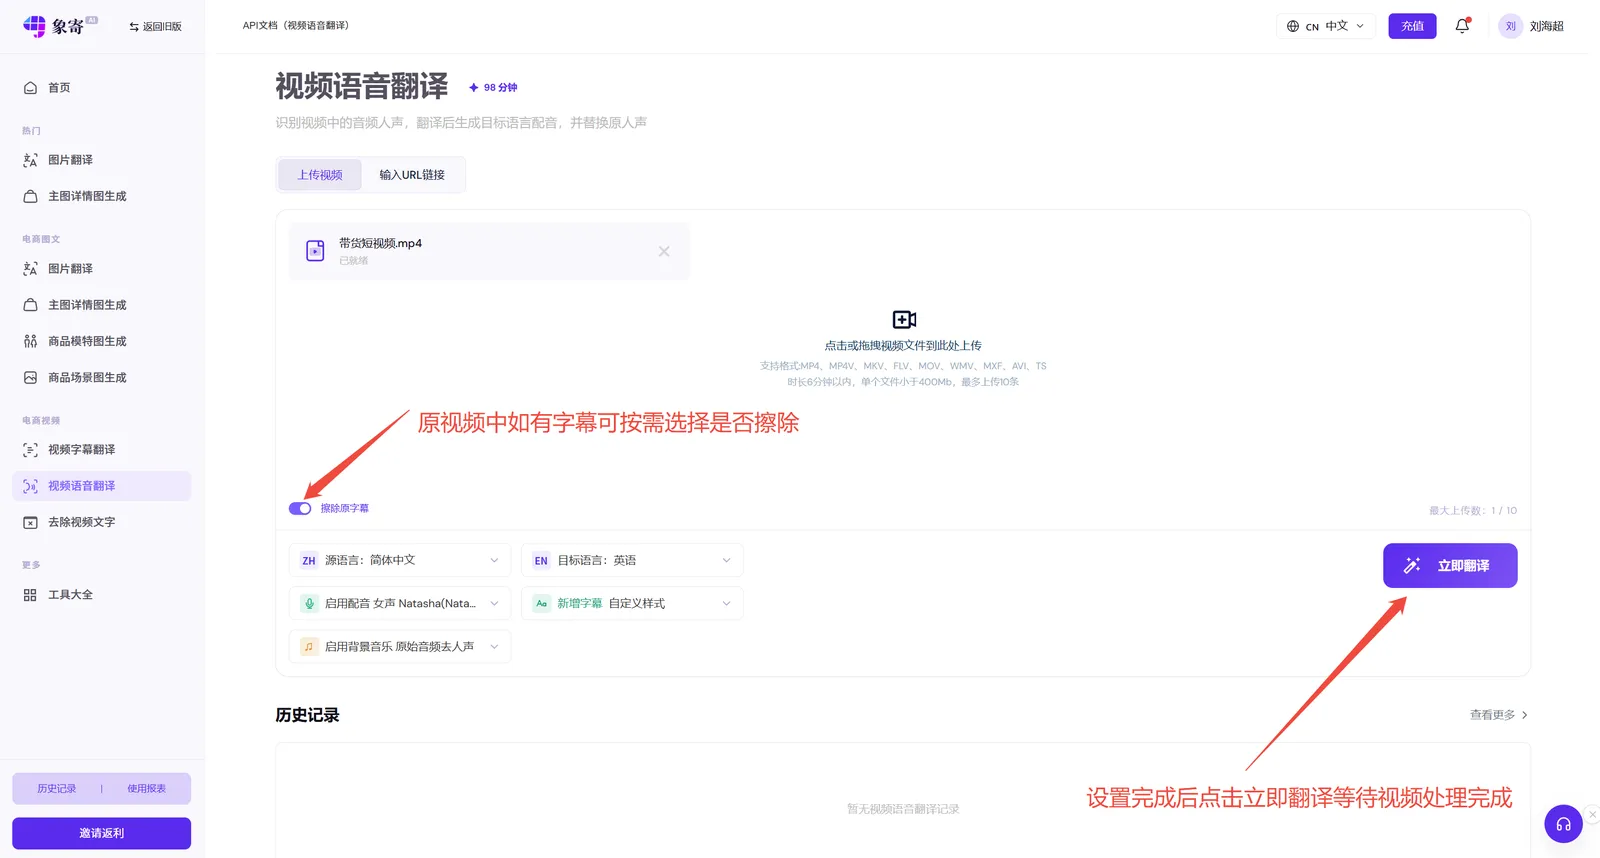
Here we take voice recognition translation as an example: select the languages you need and upload the video.
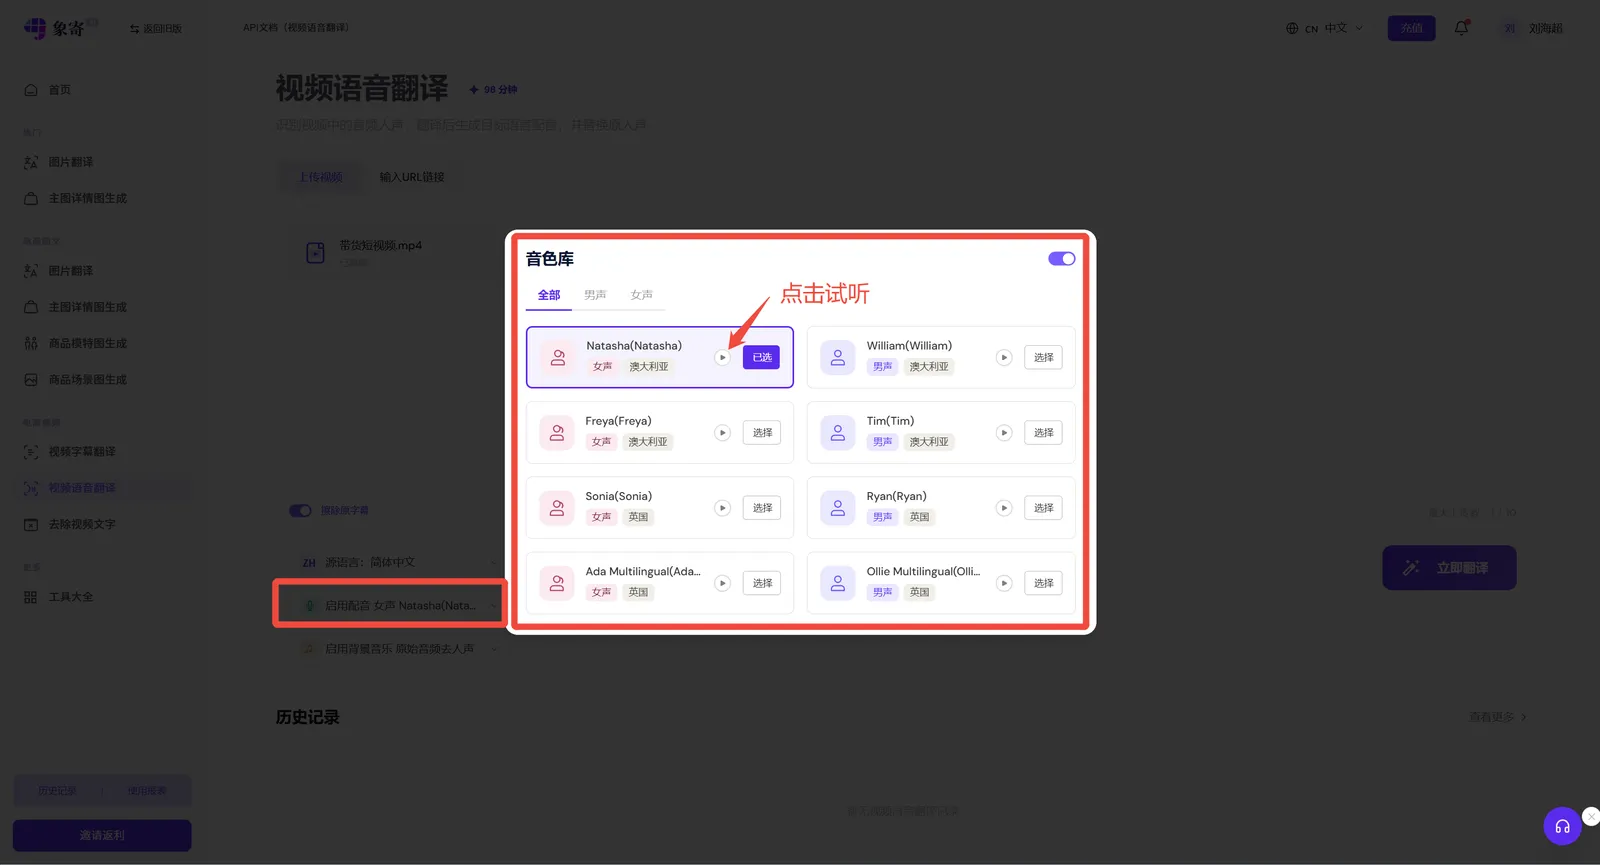
AI Dubbing Settings
AI dubbing is enabled by default. Click the panel on the right of the dubbing option to preview voices in a pop-up and pick the one you like.
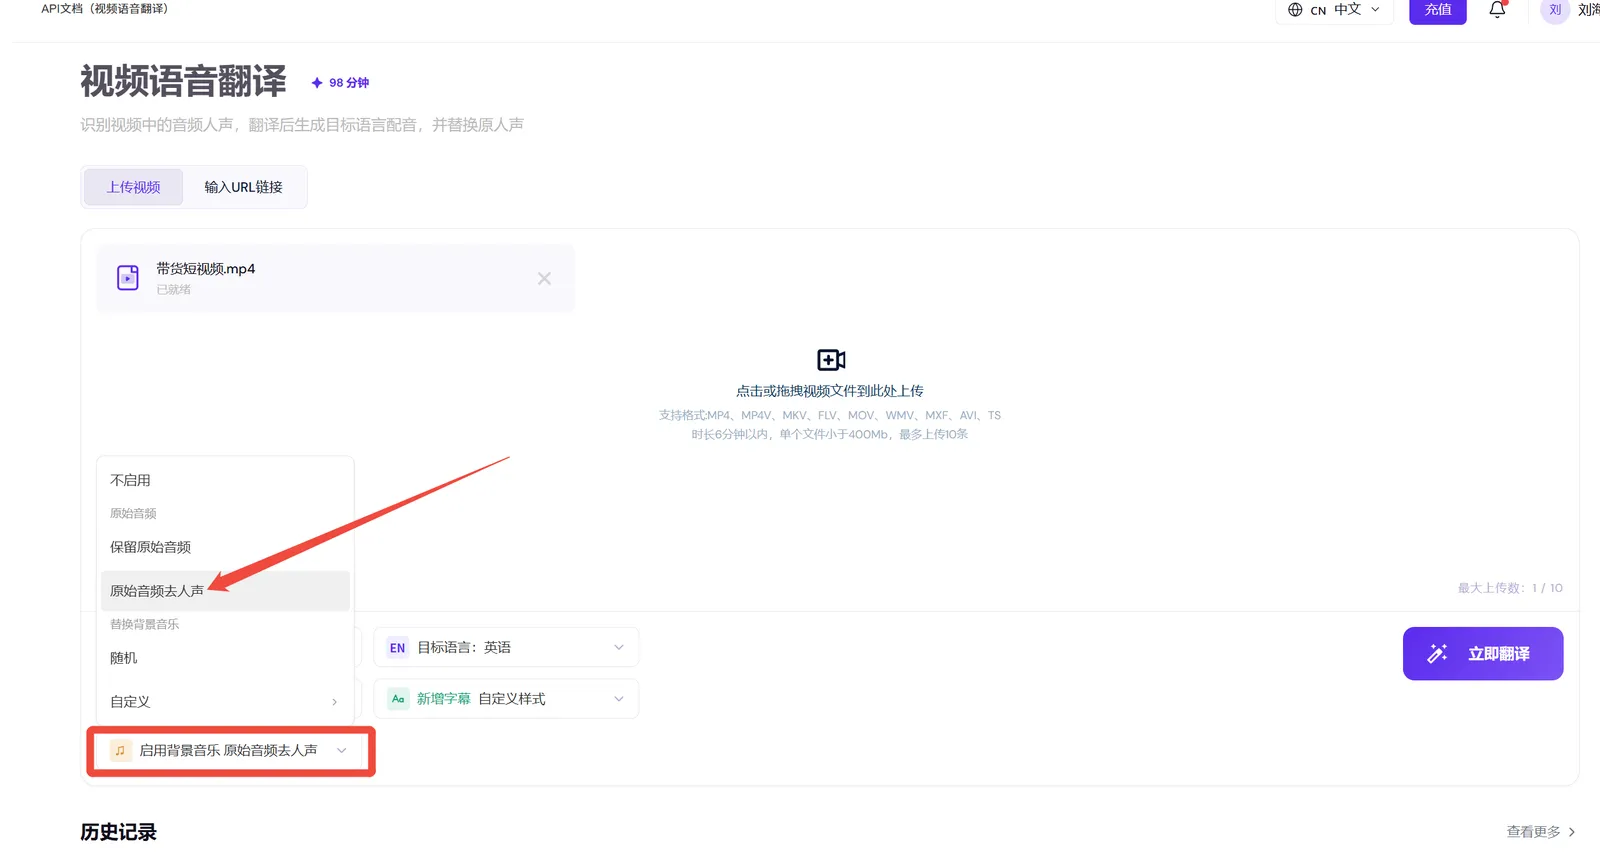
Background Music
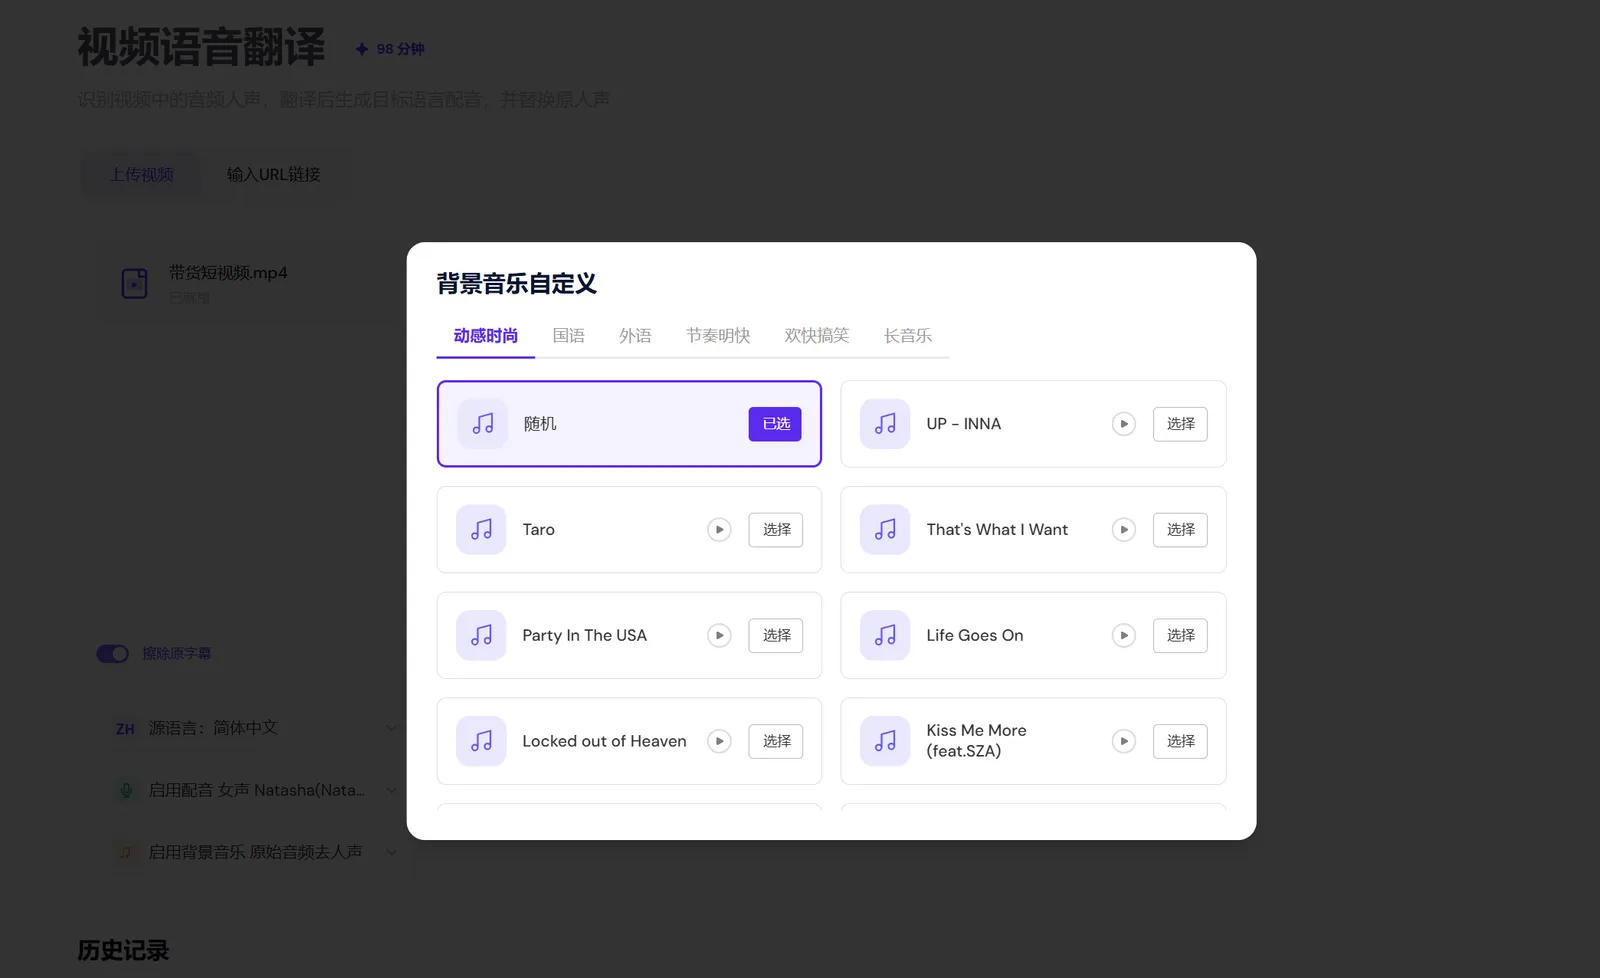
Enabling background music removes the vocals from the original audio by default — it strips the narration while keeping the music and sound effects. You can also pick a track from our music library.
Subtitle Style Settings
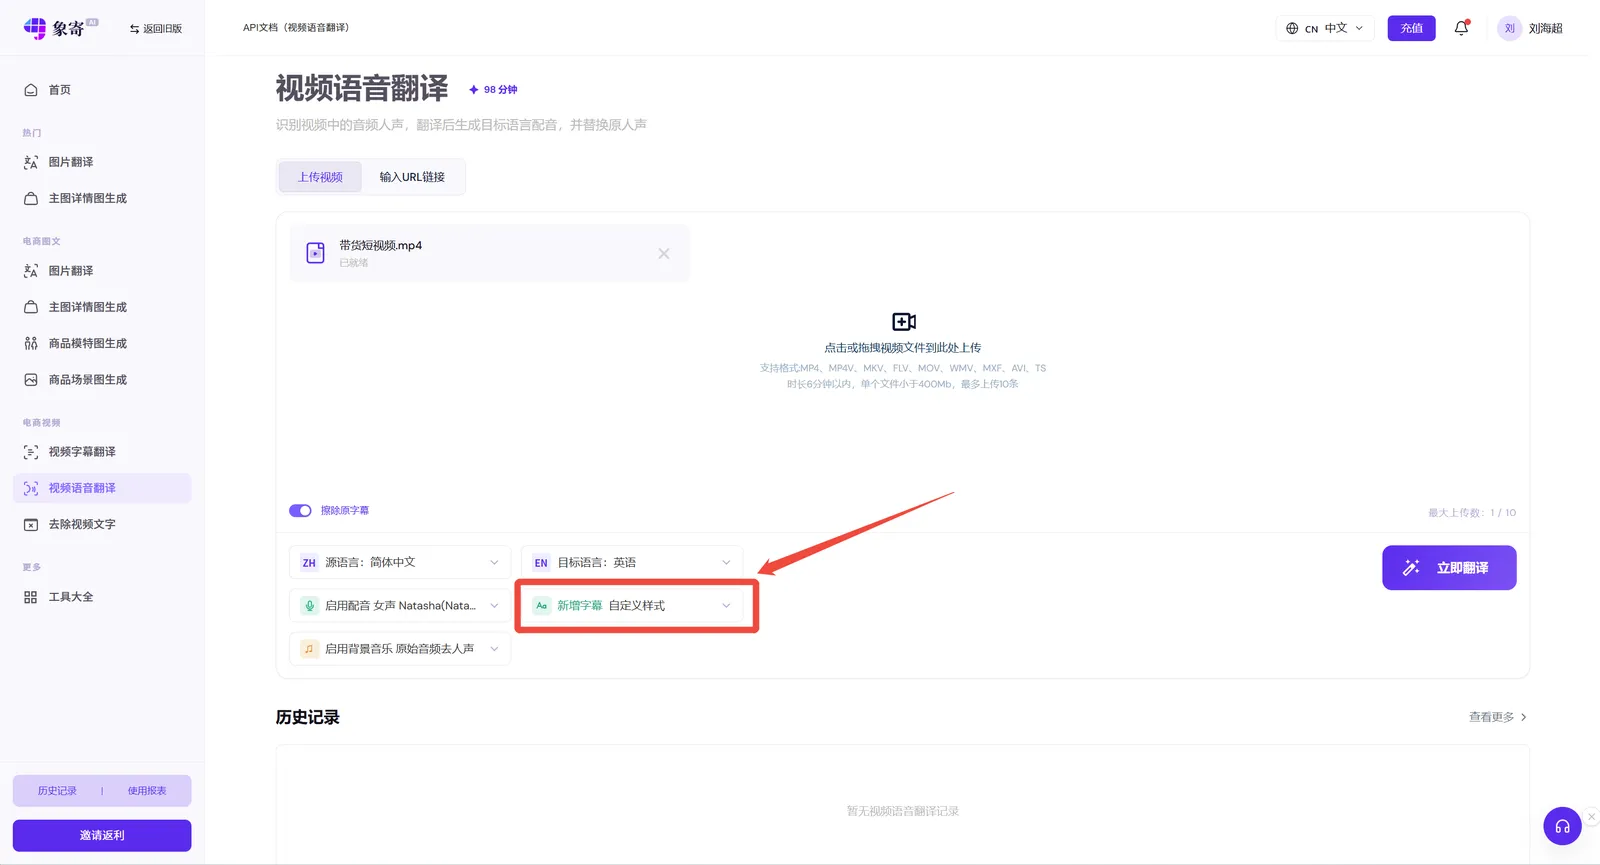
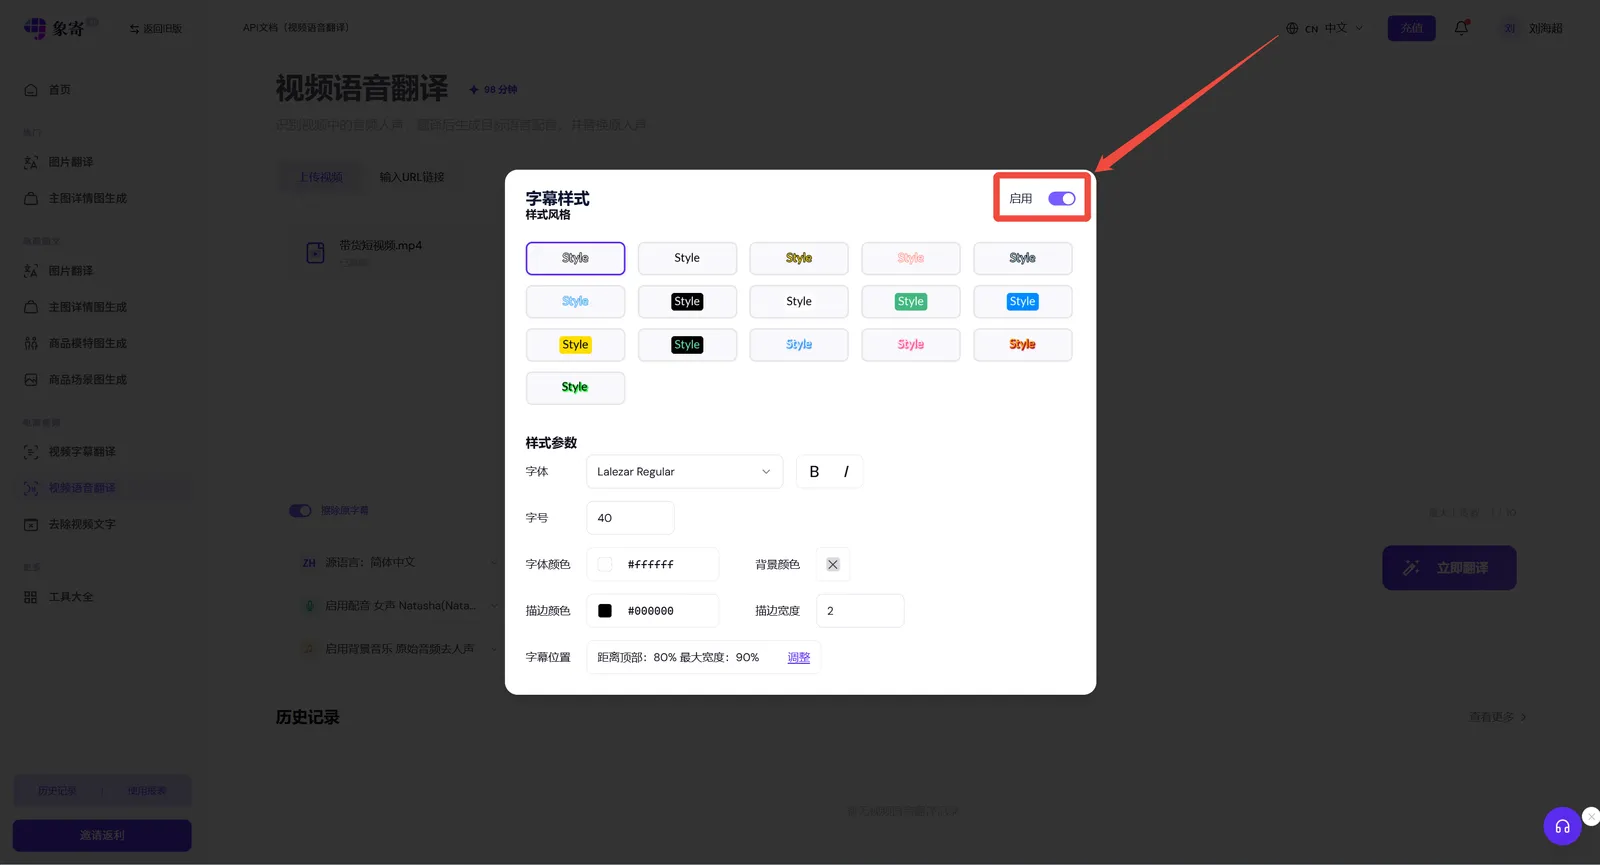
Turn subtitles on or off as needed. When enabled, the subtitle style and position are fully customizable.
Once the upload is complete, the video starts translating.
Step 2: Edit Subtitles and Dubbing
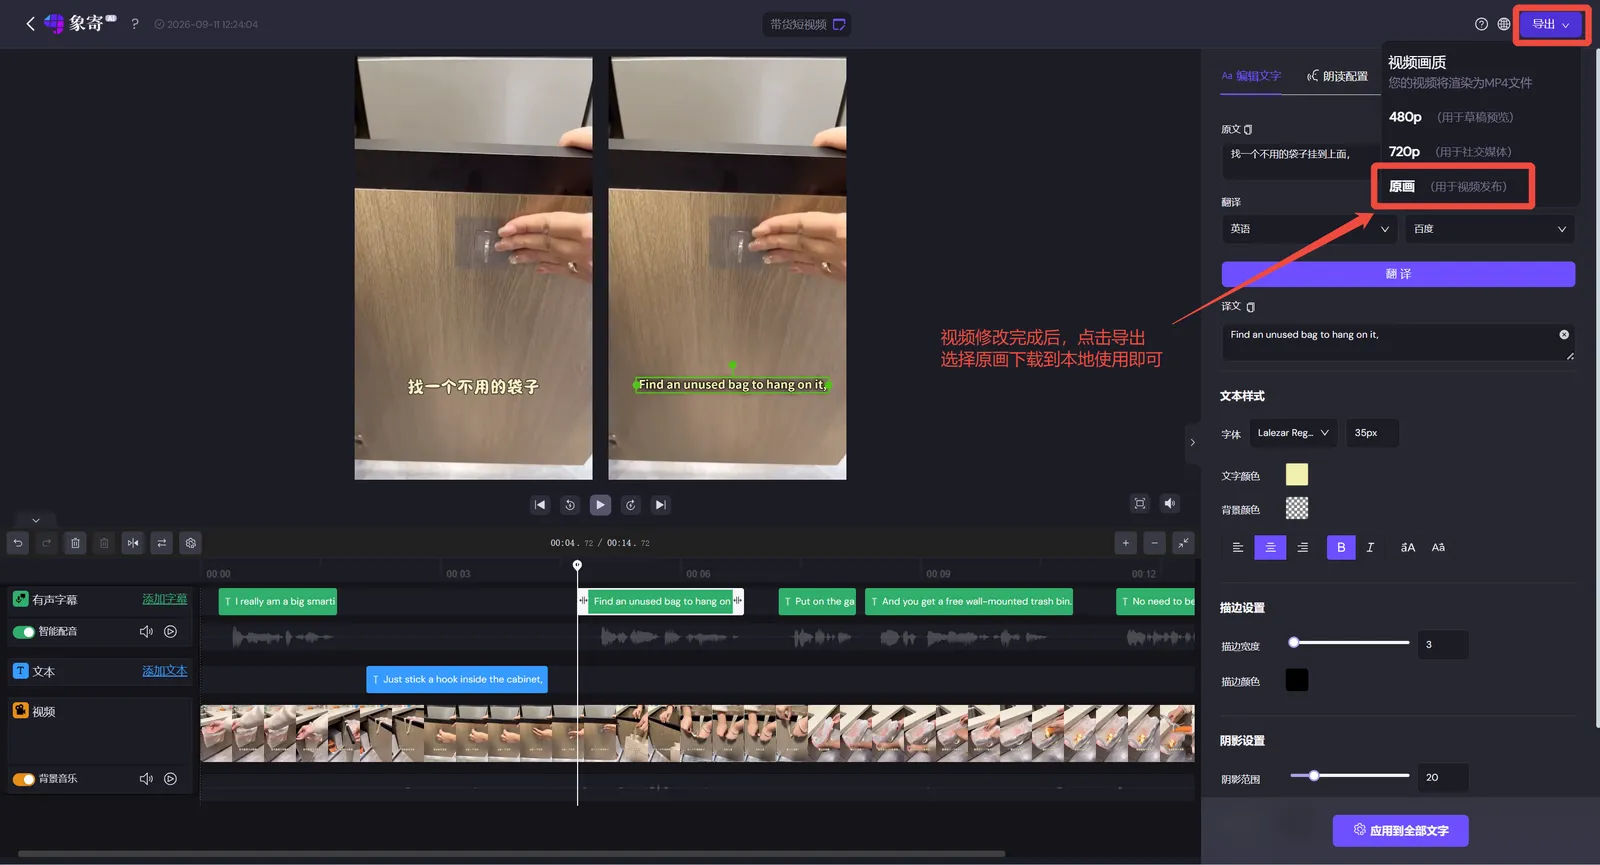
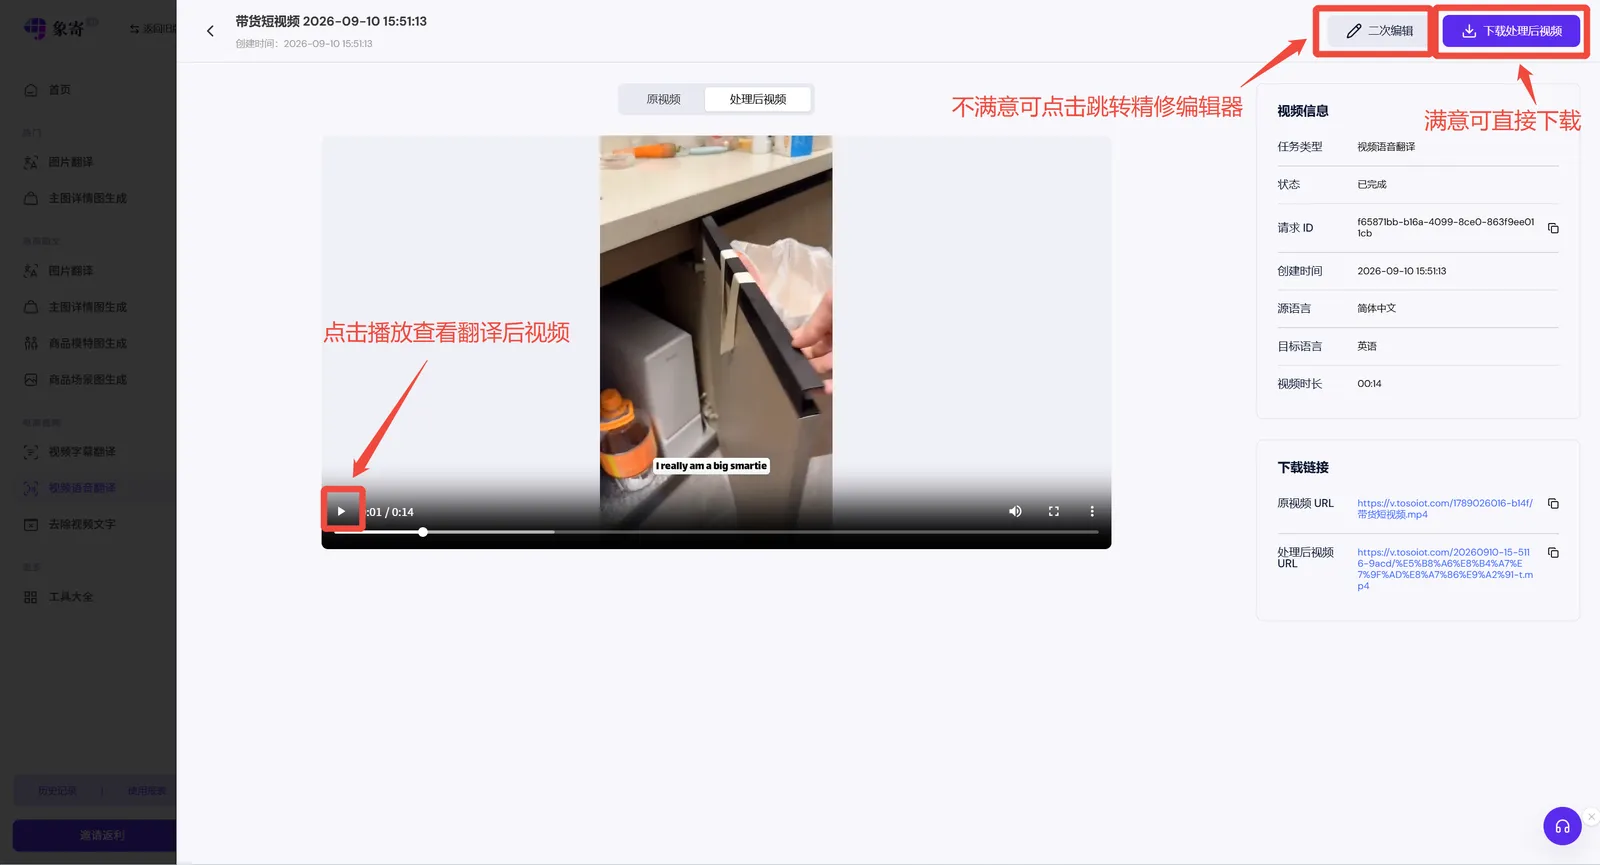
After translation, you can preview and download the video directly, or edit it further. Click the 【Edit】button to open the video translation workbench.
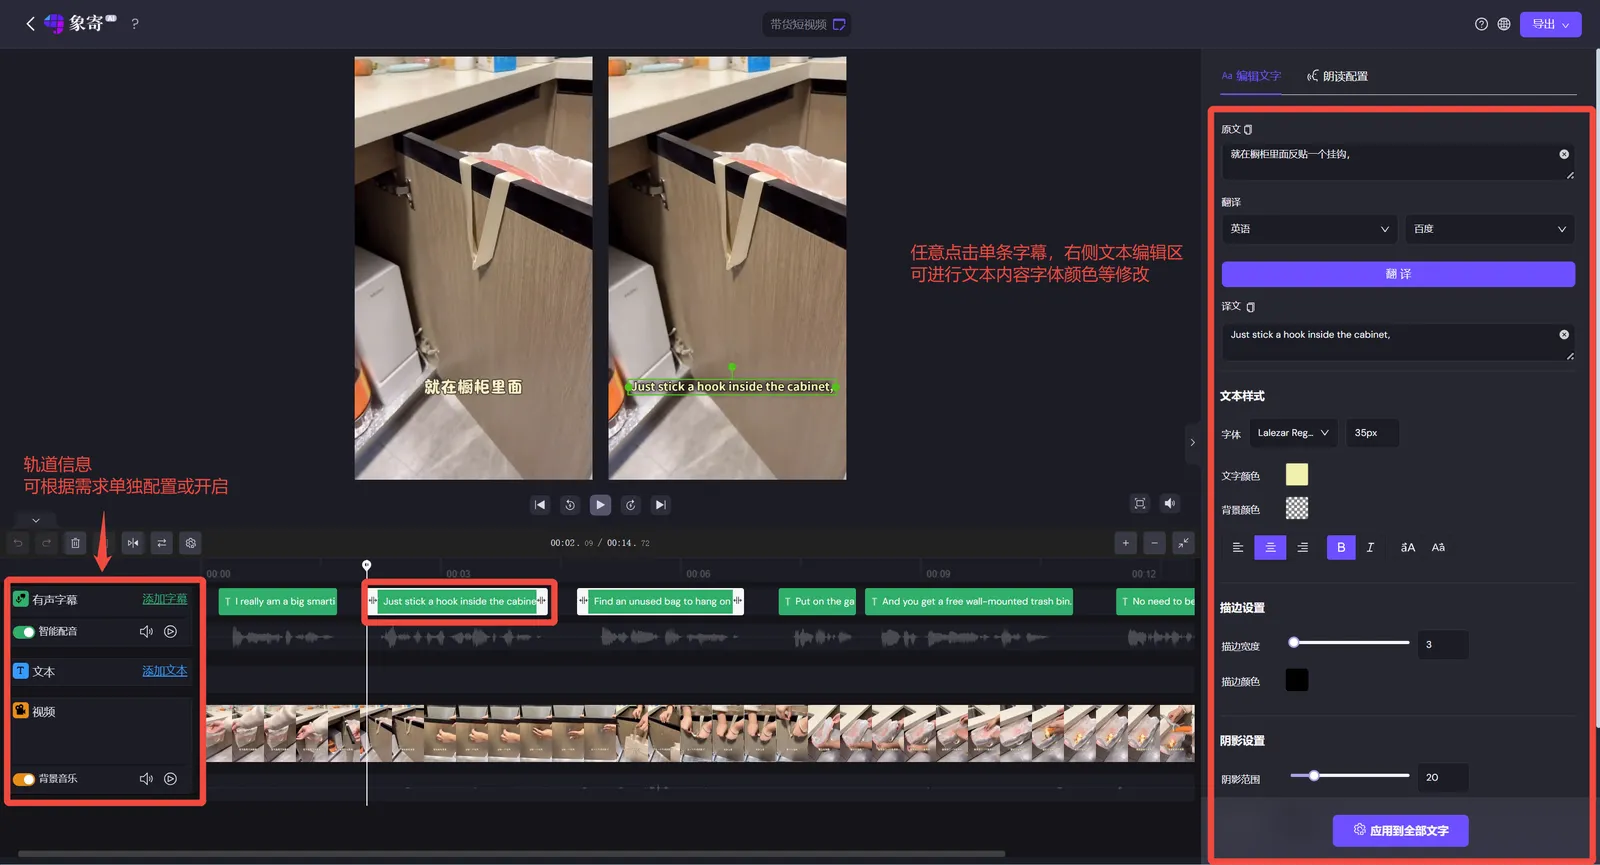
Click any subtitle or text and an 【Edit Subtitle】 pop-up appears on the right. In the text editing area you can modify the content, font, size, color and more of the selected subtitle.
Dubbing Settings
Click 【Dubbing Settings】 to adjust the voice-over of subtitles. After modifying the subtitle content or dubbing settings, click 【Preview】 to regenerate the updated voice-over audio and replace the automatic dubbing.
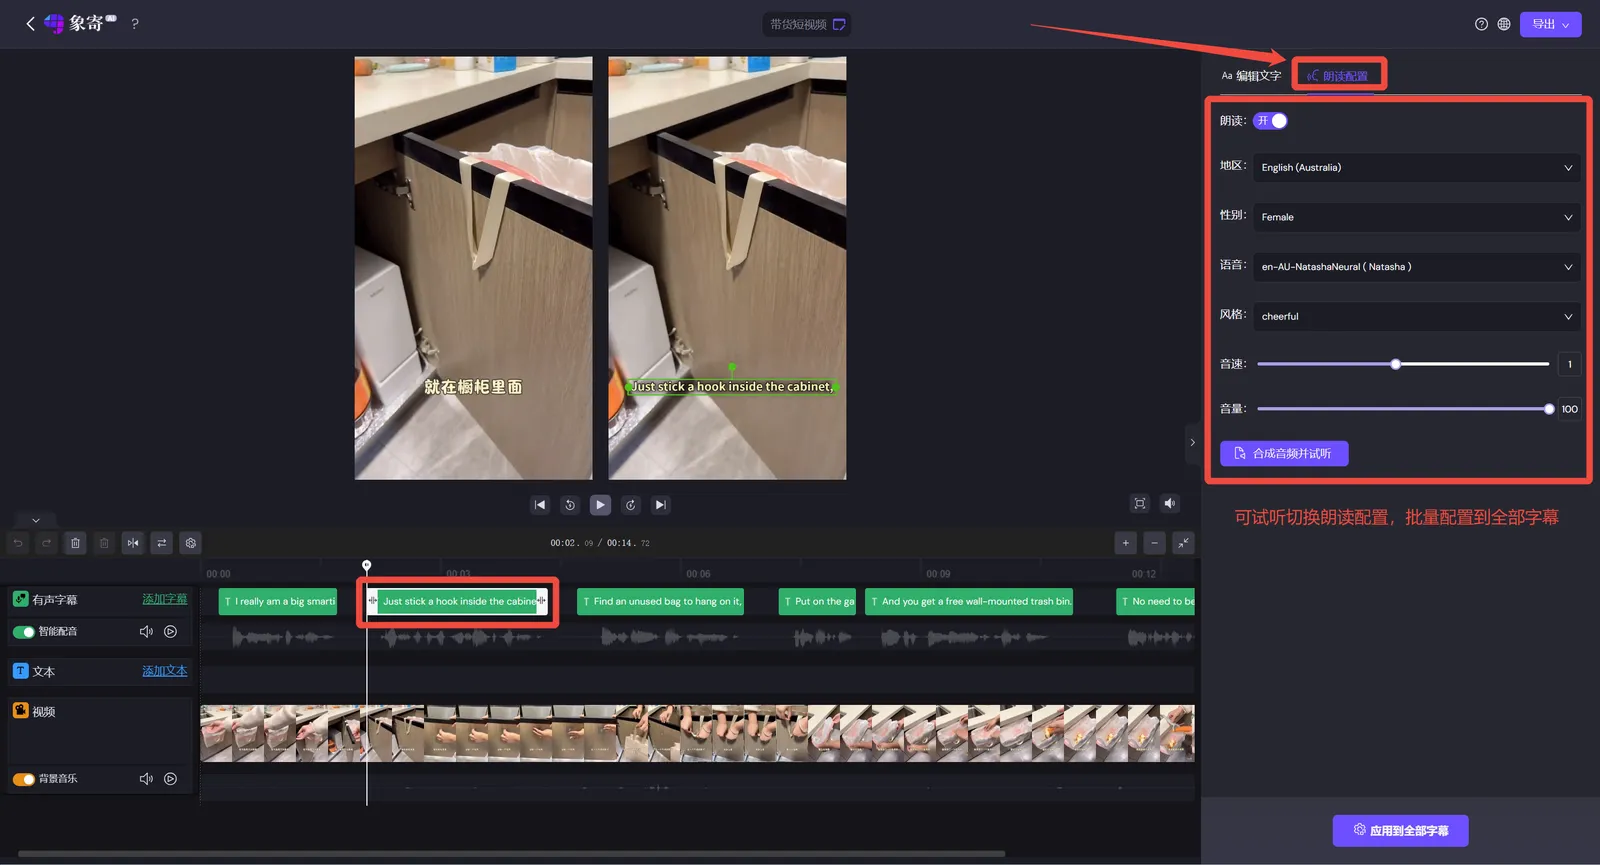
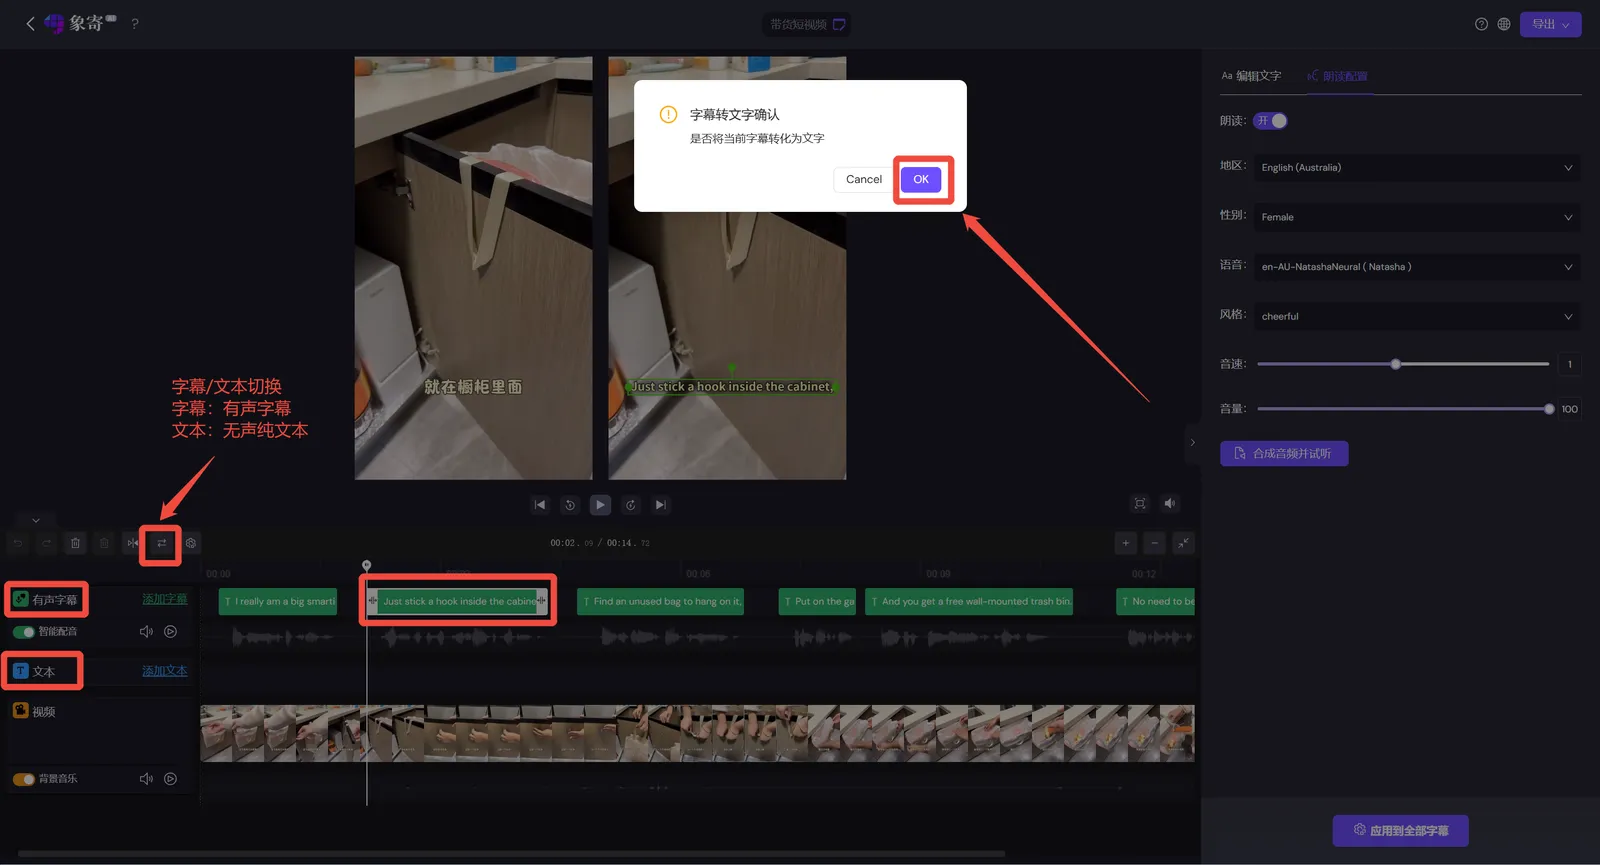
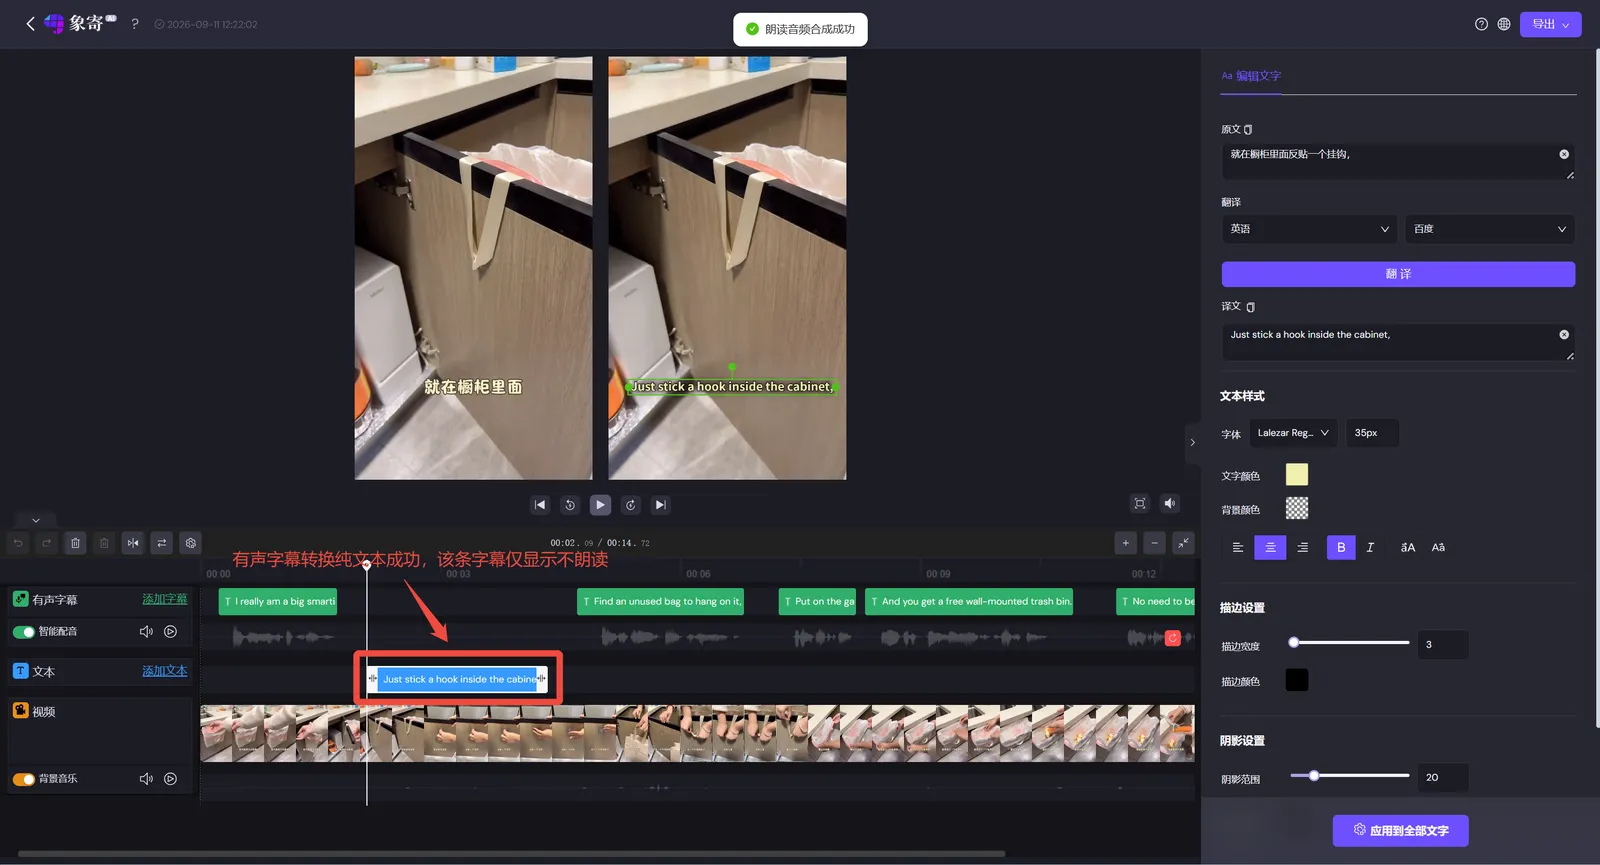
If a title should not be read aloud, or a line is skipped, click that subtitle to toggle between voiced subtitle and plain text (you can switch back and forth freely).
Step 3: Export the Video
When everything looks good, click the 【Export】button in the top-right corner, choose the quality you need and export the video for publishing.